As the futile attacks continued at Helles, the Allies began looking at alternative strategies to break the deadlock. Lieutenant-General Birdwood, the ANZAC commander, formulated a plan to break through the Ottoman lines at Anzac and seize the heights of the Sari Bair range. Lieutenant-General Hamilton had given up on breaking out at Helles and seized upon Birdwood’s idea. He expanded the plan to include landing two British divisions at Suvla Bay, 8 km north of Anzac Cove, and launching diversionary attacks at Cape Helles.
Complicated plan

At Anzac Cove, the task of carrying out the assault on Sari Bair fell to the New Zealand and Australian Division, the newly arrived British 13th (Western) Division, 29th Indian Brigade, and part of the 10th (Irish) Division. Major-General Godley assumed overall command of this force.
Sir Ian Hamilton
Lieutenant-General Sir Ian Hamilton commanded the MEF at Gallipoli until replaced in October 1915. Described by British PM Herbert Asquith as having ‘much experience of warfare … but … too much feather in his brain’, Hamilton was never able to inspire his commanders or gain the confidence of his troops during the ill-fated campaign.
The success of Hamilton’s plan rested on timing and speed. While the Australians made a diversionary assault to distract Ottoman attention, two columns of men would advance up the Sari Bair range and capture the three key high points of Chunuk Bair, Hill Q and Hill 971 (Koja Chemen Tepe) during the night of 6-7 August. At dawn, a joint assault on the Nek from New Zealand and Australian forces on Chunuk Bair and Russell’s Top would complete the capture of the whole ridge as far as Hill 971.
Meanwhile, British troops would land in Suvla Bay, north of Anzac, and move forward to support the assault on the range.
Initial attacks: 6-7 August

The August offensive opened on 6 August with an Australian attack on Lone Pine, at the southern end of the Anzac perimeter, and diversionary British and French attacks at Helles. While Helles was a costly failure, Lone Pine proved more successful. Four days of savage fighting secured the area for the Australians at the cost of more than 2000 casualties. While the attack sucked in some Ottoman reserves, this proved counterproductive, for they redeployed on the Sari Bair range.
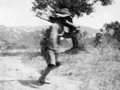
Godley’s attack began after dusk that night. As soon as it was dark, two covering forces moved out to capture the foothills over which two assault columns would move to seize Chunuk Bair, Hill Q and Hill 971. Everything went to plan initially. On the right, New Zealand Mounted Rifles units and the Native Contingent captured four of the five key features assigned to them – Old No. 3 Post, Big Table Top, Destroyer Hill and Little Table Top. The fifth (Bauchop’s Hill) proved tougher to crack, with the Otago Mounted Rifles suffering some 100 casualties in taking it, and losing their commanding officer, Lieutenant-Colonel Arthur Bauchop.
At 9 o’clock sharp the Mounteds and the Maori were to charge. Some of the Maoris were to act in conjunction with the Auckland Mounteds in the attack on old No. 3 Outpost. As the sun was setting on Friday 6th of August they gathered around their native chaplain in fighting array, and a brief service as held in their own tongue. To me it was a historic scene. After a few words the hymn ‘Jesu Lover of My Soul’ was sung in Maori, to a tune of their own. … My squadron stood round silent, listening intently. There was something pathetic about the tune and scene that brought tears to my eyes and yet as we listened we felt that they and we could go through anything with that beautiful influence behind us. The hymn ceased. There was a silence that could be felt and then Maori and Pakeha heads were bowed while the native prayer and benediction were pronounced. A brief message was read to the Contingent, and they dispersed, we all remarking that they could not go wrong after all that grand singing. Later on we heard the fierce ‘Kamate’ from the same throats resounding from the hill they captured. The war cry mingled strangely with the cheers of the Aucklanders.
Harry Browne, Wellington Mounted Rifles Regiment, in Gavin McLean, Ian McGibbon and Kynan Gentry (eds), The Penguin book of New Zealanders at war, Penguin, North Shore, 2009, pp. 141–2

By the time the Mounted Rifles secured their objectives, the attack was several hours behind schedule. From that point on, the plan began to fall apart. The left assaulting column, made up of British and Indian troops, got lost in the darkness and rugged terrain. The right assaulting column never formed. Its two elements — the New Zealand Infantry Brigade and an Indian mountain battery — did not make their intended rendezvous on Rhododendron Spur, below the summit of Chunuk Bair. At dawn on 7 August, the New Zealand Infantry Brigade’s commander, Brigadier-General Francis Johnston, was still waiting on the Spur for missing units to arrive. It was daylight before the troops were ready to move; by then the Ottomans had reinforced Chunuk Bair.
Across the valley, Birdwood decided to press ahead with the planned dawn attack at the Nek even though the New Zealanders were in no position to launch a converging attack from Chunuk Bair. He thought that an assault might distract the enemy and help the assaulting columns take Chunuk Bair. Successive waves of Australian light horsemen were cut down charging the Ottoman trenches. By the end of the attack, more than 200 Australians lay dead or dying in no-man’s-land.
Despite the carnage at the Nek, Godley insisted that Johnston press on, and at 10.30 a.m., the Auckland Battalion attacked Chunuk Bair. They got as far as an old Ottoman trench at the Pinnacle before heavy machine-gun and rifle fire forced them to take cover. When Johnston ordered the Wellington Battalion forward, its commander, Lieutenant-Colonel William Malone, refused to attack during daylight, insisting he would not send his men ‘over to commit suicide’. Godley eventually agreed to postpone the attack until nightfall.
Battle for Chunuk Bair: 8-10 August

Malone’s Wellington Battalion advanced up onto Chunuk Bair in the early hours of 8 August. They found it unoccupied – the defenders had surprisingly pulled out during the night. It was not long before the Ottomans realised their mistake and sent troops to retake the position. For the next 24 hours, the Wellington Battalion, reinforced by the Auckland Mounted Rifles and two British battalions, held the summit against repeated attacks.
Finally got there [Chunuk Bair] and [had] an instantaneous look-round to see who else was there, and then you had to get busy on the Turk bloke because he was there and he let you know he was there.
There was not very much in the way of shelter excepting the trench on the Turkish side, and that from us was on the downhill side. We took that.
That is where we started to get close enough for the bayonet. But somebody’d forgotten to tell us that when you fired 20 or 30 rounds in rapid fire, and then you’d stick the bayonet on, you couldn’t hold the rifle to use the bayonet because it was red hot.
We got over that with the wounded. The wounded in the forward trench were the bravest ever; they are now skeletons on Chunuk Bair. It didn’t matter how badly they were knocked, they still loaded rifles for us. In the holding of the ridge in the first hour or two, I had four rifles – my own and three others that the chap down below was loading for me. He had one leg nearly shot off and the other leg was just a mangled-up mess – and he was just handing them up.Vic Nicholson, Wellington Battalion, in Jane Tolerton, An awfully big adventure: New Zealand World War One veterans tell their stories, Penguin, Auckland, 2013, p. 90
Casualties amongst the defenders were extremely high. The New Zealanders on Chunuk Bair were completely isolated from the rest of the Allied line and subjected to intense artillery, machine-gun and rifle fire from nearby Hill Q and Battleship Hill. There were also instances of ‘friendly fire’ from artillery and naval gunfire laid around the summit to break up the Ottoman infantry assaults – Malone was killed in one such incident on the evening of 8 August.
First NZEF Victoria Cross
Corporal Cyril Bassett, New Zealand Divisional Signals Company, was the only NZEF soldier awarded the Victoria Cross during the Gallipoli campaign (NZ-born Alfred Shout won a posthumous VC serving with the AIF at Lone Pine). Bassett won the VC, the highest award for valour in the British and dominion forces, for laying and repairing signal cables under fire on numerous occasions, including on Chunuk Bair, 8-10 August.

Attacks on Hill 60
Sari Bair was not the last offensive action by the New Zealanders. With Anzac and Helles locked in stalemate, the British planned an attack at Suvla, aimed at taking the Anafarta Ridge. The Anzacs would launch a supporting attack against Hill 60, a small piece of Ottoman-held high ground between the two Allied areas.
With ANZAC units severely depleted after Sari Bair, Birdwood cobbled together a composite force of New Zealand, Australian, British and Gurkha troops for the Hill 60 attack. New Zealand’s contribution to this force came from the Canterbury and Otago Mounted Rifles regiments, which could barely muster 400 men between them.
The 21 August attack was another costly failure. Allied planners underestimated the strength of Ottoman defences and the attack quickly broke down. The New Zealanders managed to capture part of the Ottoman trenches on the southern side of the hill, while British troops had similar success on the north-western side. Nobody else got as far, and the attack cost over 2000 casualties, including 200 New Zealanders. The attack at Suvla also failed.
On 27 August, the surviving New Zealand mounted riflemen took part in another attempt to clear Hill 60. After two days of bitter fighting, the hill remained firmly under Ottoman control. Once again, casualties were appalling. In three disastrous weeks, the New Zealand infantry and mounted brigades had effectively been destroyed as fighting forces.

